
Steps for successfully setting up a Jekyll blog on Windows hosted by GitHub Pages.
Context
In my new role one of the goals is to communicate more about what we do and how we do it. I’ve written web articles and a couple of books in the past but these days the primary communication and sharing vehicle seems to be the technical blog.
Setup
1) Download Ruby and the Ruby DevKit
I’m running Windows 8.1 64-bit, so I needed to download a 64-bit Ruby distribution. I downloaded the prebuilt Ruby 2.2.1 for x64 from RubyInstaller for Windows
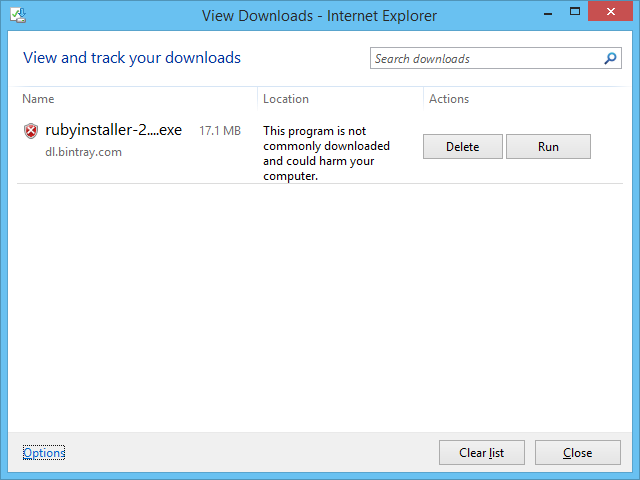
Note: Windows complained that This program is not commonly downloaded and could harm your computer, please ignore for now.
I also needed the Ruby Development kit, so I downloaded the Ruby DevKit for x64.
2) Install Ruby and the Ruby DevKit
Double clicking on the Ruby Installer exe file yields an error, select “More Info”:

At this point if you want to re-assure yourself, run your anti-virus checker directly on the exe file, but it passes the virus checkers so we select “Run Anyway”:
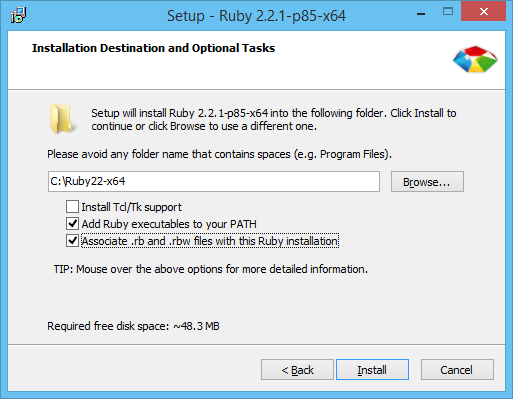
Note: Be sure to select the “add to path” option.
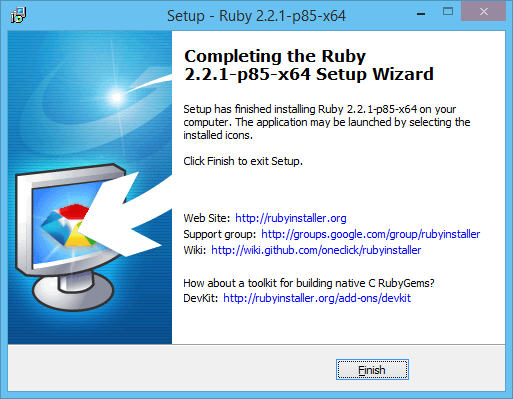
I also decided to associate the file extensions and after the install a happy success window:
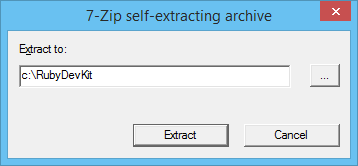
Now double clicking the Ruby DevKit exe asks where to extract to, I specified c:\RubyDevKit.
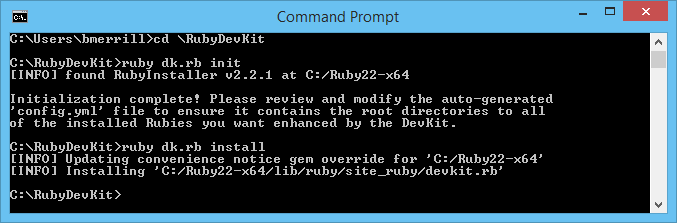
3) Initialize the Ruby DevKit
Now open a console window and type:
c:
cd \RubyDevKit
ruby dk.rb init
ruby dk.rb install
Your results should look like:
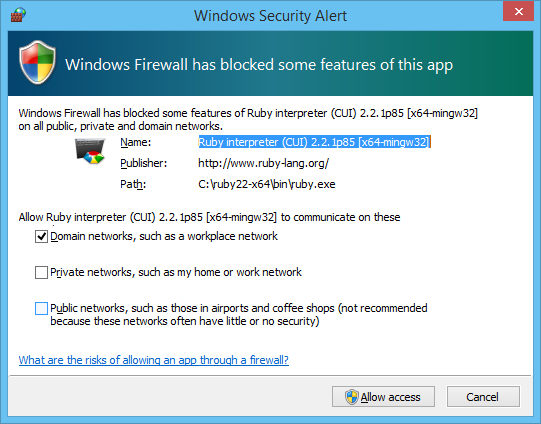
4) Install the Bundler Gem
using the same console window as above, now:
gem install bundler
You may also get a Windows Firewall alert that you can accept the exception:
5) Install the Jekyll Gem
using the same console window as above, now:
gem install jekyll
This may take a few minutes (depending on your network speed) as it installs Jekyll and its dependencies. On my install it reported 31 gems were installed.
6) Install the syntax highlighter
For Jekyll you have a choice for syntax highlighters, I chose rouge which did not require any additional runtimes (eg Python). rouge is a Ruby-based syntax highlighter, see the Rouge Project for more details.
Aside: This will become the default for GitHub Pages in the near feature but for now they are still using Pygments. So for now, I will have to switch highlighter selections between dev mode and prod mode.
gem install rouge
Eventually, I’ll modify the _config.yml file to set rouge as the highlighter:
highlighter: rouge
7) Fork a design
I looked at several Jekyll site designs and selected the HPSTR style. First I forked mmistakes design and renamed it to blog-theme.
8) Custom your local fork
I made some minor changes in my local fork but mostly to where they could still be reused, or used in a pull request.
9) Create your GitHub pages repository
On the GitHub site create a new repository called username.github.io. Replacing username with your github username.
10) Clone your new GitHub pages repository locally
I used the Windows desktop tool, but you can also do this directly from the command line as well.
11) Add your forked design as an upstream source and fill your repository
You now have an empty repository, let’s fill it from our forked design:
git remote add upstream https://github.com/username/blog-theme.git
git fetch upstream
git merge upstream/master
12) Commit and Resync to GitHub
Using the GitHub desktop tool, since the repositry was empty, I selected “Publish”.
13) Run Jekyll locally
Modify your _config.yaml file to specify your dev environment. For emacs I have mine setup, to quickly switch between local and dev:
###############
# dev config
url: http://localhost:4000
highlighter: rouge

# prod config
#url: https://zbrad.github.io/blog-theme/
#highlighter: pygments
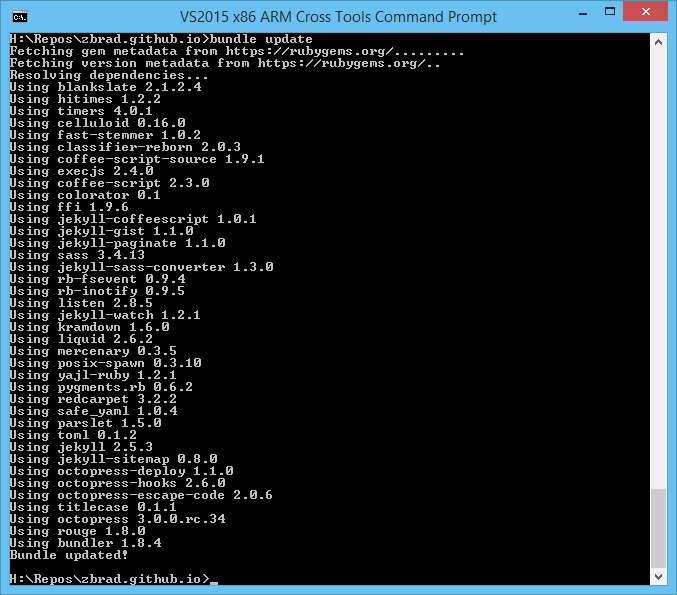
Now that you have an initial Jekyll design installed, you should verify that Jekyll has been configured. Perform a bundle update as:
bundle update
My output looked like:
Now we can start the local Jekyll server:
bundle exec jekyll serve
You can now start a browser and direct it to: http://localhost:4000.
References
I actually created this article after I had already posted my initial site so it was actually a very useful exercise for me to review all the steps. During that time I learned about correctly setting an upstream fork to better seperate your local modifications of a design, from those changes that would be more personal to your site than generally useful.
Links: